
How to Wax at Home Like a Pro

The first time I tried to wax my legs at home was a train wreck. How hard could it be, right? Well, let’s just say those gals at the salon make it look like a walk in the park. Ripping hair off your body isn’t for the faint of heart. Nor is it for the unprepared (which I surely was). But after plenty of trial and error, I can officially say that, if you do it right, it might even be a little enjoyable in a masochistic, self-care sort of way. And you know what else? It beats shaving any day, so I’ll take it.
Here’s how to wax at home like a pro.
How to Wax at Home
Waxing your legs at home can be a cheap and easy alternative to those never-ending salon appointments. However, it can also be intimidating for newbies.
Luckily, with the right tools and techniques, anyone can achieve a smooth and long-lasting wax from the comfort of their own home. To make things easy on you, we’ll walk you through everything from prepping the skin and choosing the right depilatory wax to applying the wax and taking care of your skin when it’s all over.
Whether you’re a seasoned at-home waxer or a first-timer, these tips and tricks will help you achieve a salon-quality result.
1. Gather your waxing supplies.
The only supplies you really need are:
—A popsicle stick
—Depilatory wax
—Cotton waxing strips
Everything else falls into the nice to have but not necessary category. If those things will help you get the job done more easily, go ahead and purchase those too. But I prefer to Marie Kondo my waxing supplies and keep only the necessities on hand.
Optional waxing supplies:
—Cornstarch or baby powder
—Wax warmer
—Exfoliating scrub
—Tweezers
—Pre-wax cleanser
—Post-wax lotion

2. Choose the right wax.
For sensitive skin, I like to make my own all-natural sugar wax. It’s less expensive than purchasing wax at the store, and since it’s made with just 3 ingredients (brown sugar, lemon, and water), it’s better for you, too.
Some sugar wax recipes don’t require you to use strips—just apply and rip off. But getting the right consistency can take a lot of trial and error (and wasted batches of wax).
Instead, I whip up this simple wax recipe and use cotton wax strips to ensure clean removal.
Homemade Sugar Wax
—1 cup brown sugar
—2 tablespoons water
—1 lemon, juiced
Combine all ingredients in a saucepan on medium heat. Stir constantly until you get a thick, honey-like consistency (it will darken as it cooks, and that’s okay). This may take between 10 and 20 minutes, depending on the size of your saucepan and how hot your stove gets.
Remove from the heat and let sit for 20 minutes to thicken up. If it’s too thick, add a tablespoon of water at a time until you get back to the right consistency.
Store Bought Wax Options
If you’d prefer not to make your own wax, here are a few of my favorite store bought options for at-home hair removal:
MOOM Soft Wax – Like the name suggests, this is a soft wax that needs to be applied with an applicator stick and removed with the help of fabric strips. It’s great for first-time waxers or those with sensitive skin.
Sugar Paste (Hard) – If you’ve used sugar wax in the past, this sugar paste is similar to what you’ll find at the salon. It’s incredibly hard, so you don’t need to use fabric strips. But it’s not very beginner-friendly, so only use it if you know what you’re doing.
Flamingo Body Wax Kit – This simple wax strip kit is perfect for a fuss-free wax job. Since they come in single use packages, you can throw a few in your suitcase or bag for last-minute touch-ups at the pool or beach.

3. Prep your skin.
Making sure the skin is clean (like, really clean) helps the wax adhere to the hair follicles.
Exfoliate – Gently exfoliate legs with a wet washcloth, loofah or sugar scrub a day or two before waxing. This will help remove any dead skin cells and make it easier for the wax to adhere to the hair.
Cleanse – Before waxing, make sure your skin is clean and free of any oils or lotions. Wash with a bar of soap and water or use a pre-wax cleanser that will evaporate cleanly without you having to rinse it off. Then pat dry.
Trim hair – If your leg hair is longer than a quarter inch, trim it down to about a quarter inch. This will make it easier for the wax to grab onto the hair and remove it.
Apply powder – Dust a light layer of corn starch or baby powder onto your legs to help absorb any excess moisture and oil, which can interfere with the wax.
4. Heat and test the wax.
You don’t need a wax warmer in order to wax at home successfully. Simply pop your sugar wax in the microwave for 30 seconds to warm it up slightly (if using store-bought wax, follow the instructions on the package).
Grab a popsicle stick and dab a bit of wax on the inside of your wrist to make sure it’s not too hot. If it’s not hot enough, continue heating the wax in 10-second intervals until it’s soft and spreadable but not hot enough to burn you.
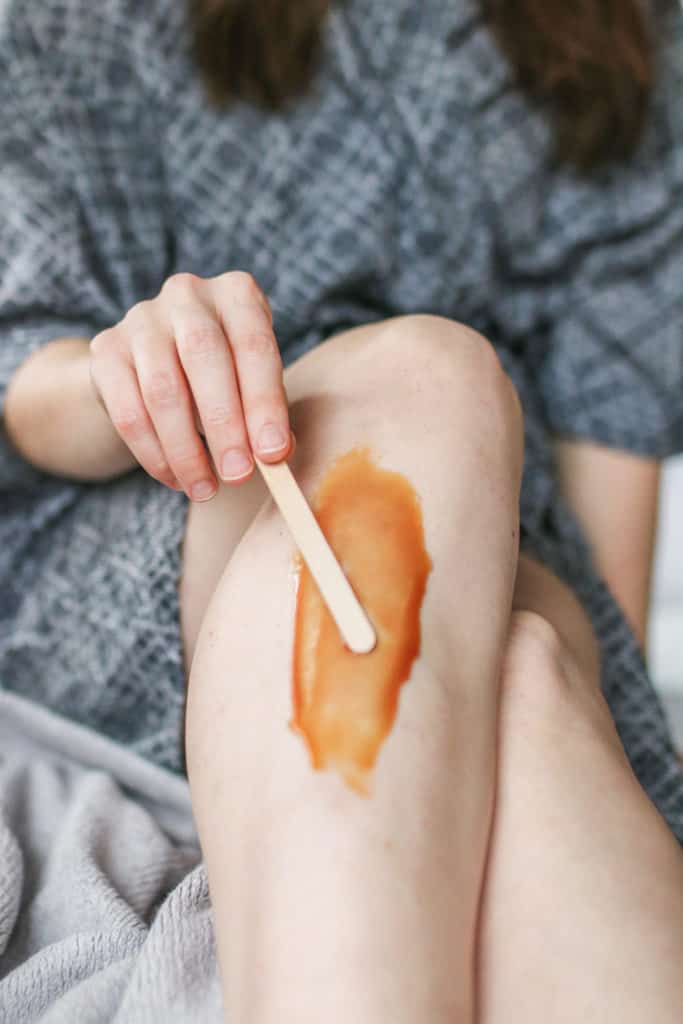
5. Apply the wax.
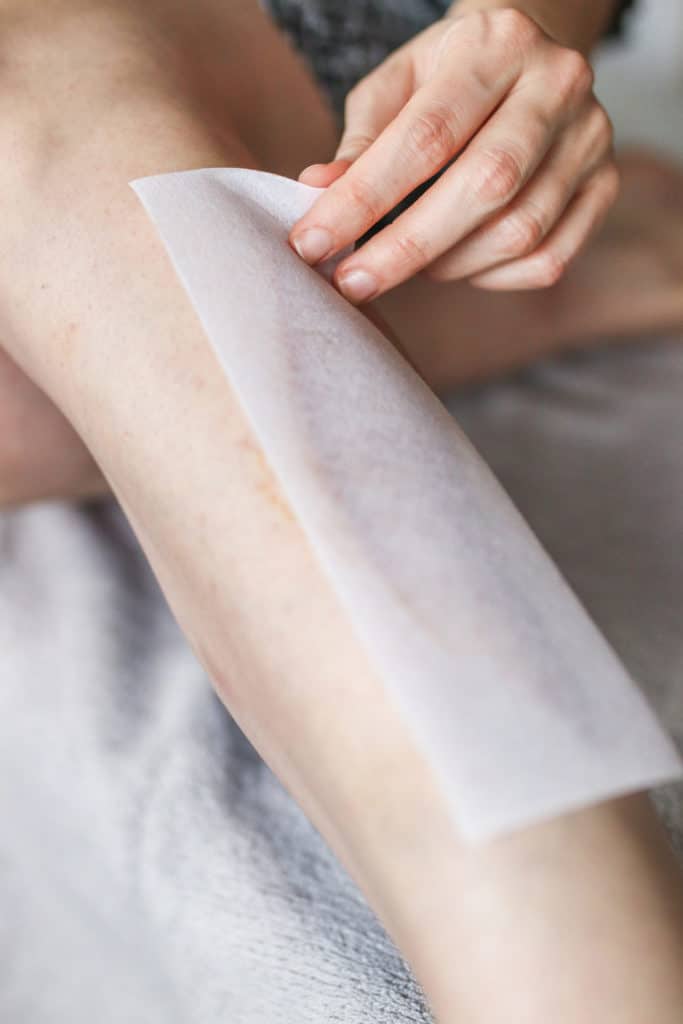
For sugar wax: Working in 2-inch sections, apply wax against the direction of hair growth. Make sure the layer of wax is thin and even, as thicker layers can be more painful to remove. Let sit for 5–10 seconds before placing a wax strip on top and smoothing it down gently.
(Note: for traditional depilatory wax: apply in the direction of hair growth and remove against the grain.)
6. Pull off in the direction of growth.
Hold the skin really tight, and quickly (like you’re flicking your wrist) pull the strip off in the same direction as the hair growth. Holding the skin helps make hair removal easier and less painful.

7. Apply a soothing balm.
While not required, feel free to apply an after-wax soothing balm or spray to calm inflammation, seal the follicles, and remove wax residue.
Caring for Skin After Waxing
Hooray! You survived your first at-home wax session. Post-wax care is just as important as the care before waxing, so here are a few things you can do to keep inflammation and irritation at bay:
Let your skin breathe. Waxing can be somewhat traumatic to your skin and hair follicles, especially if you’re just getting the hang of things, so you’ll need to let your skin recover for a few days. That means no tight-fitting clothes, heavily perfumed body products, lotions, or deodorant (if you waxed your underarms).
Avoid hot water. Since your hair follicles are exposed, skip hot showers, baths, the sauna—all of it—for 24 hours to prevent irritation and potential infection.
Exfoliate. After the first 24 hours have passed, gently exfoliate skin to help prevent ingrown hairs.
Don’t forget to moisturize! Not required, but after 24 hours, apply a light moisturizer to keep skin soft and healthy.
Waxing at Home FAQ
Will waxing make me break out?
It’s possible that waxing may lead to breakouts, especially if you’re waxing sensitive skin, such as the face, upper lip, back, and chest.
Either avoid waxing those areas, try a different wax (you may be sensitive to one or more of the ingredients in your wax), or simply use proper after-wax care (see above) to keep breakouts to a minimum.
I can’t get homemade sugar wax to work. What am I doing wrong?
There are all sorts of local factors that may cause your homemade wax to not work out, such as your climate, altitude and even just the season. This post covers a lot of the issues you may run into when making sugar wax at home. But at the end of the day, you might be better off simply purchasing commercial sugar wax, rather than spinning your wheels.
What’s the difference between hot wax and strip wax?
Wax strips consist of wax that’s been pre-applied to a disposable strip, whereas hot wax is melted in a wax warmer or bowl and applied directly to skin with an applicator stick. Hot wax is great for sensitive skin and/or thicker hair. And wax strips are ideal for less sensitive skin and thinner hair. At the end of the day, you should try out a few different types of depilatory wax and choose whatever works best for you.
How can I make waxing at home less painful?
Luckily, there are a few things you can do to make waxing painless:
Stay hydrated. Being dehydrated tightens your skin and makes it harder to remove hair follicles. Skip coffee and alcohol the day before, and drink plenty of water leading up to your wax session.
Don’t go too long between waxings. The longer you wait, the more hair you’ll have, and the thicker it will be, thus upping the pain factor.
Don’t wax the week before your period. Your body’s sensitivity to pain is heightened right before your period.
Pop a couple of ibuprofen 1–2 hours beforehand. This over-the-counter pain reliever may help lessen pain and keep inflammation under control.
How long will my home waxing last?
According to the pros, 3–6 weeks (or about 4 weeks on average) is about how long a typical waxing treatment may last—but everyone’s hair grows at different rates. Just remember, even if you start to notice stubble, you’ll want to wait until the hair is approximately 1/4″ long before waxing again.
Can I go out in the sun after waxing?
It’s best to avoid sun exposure for at least 24 hours after waxing. If you have to go outside for an extended period of time, make sure to apply a broad spectrum sunscreen and re-apply regularly!
Will waxing make my hair grow back thicker?
No, waxing (or shaving, for that matter) does not make hair grow back thicker, darker, or coarser than before.
Why do my legs not feel completely smooth after waxing?
That’s because hair grows in three phases, and even after waxing, there are still new hairs beneath the skin’s surface waiting to break through. While some waxing pros claim that it takes three waxing sessions (about 4 weeks apart) to get completely smooth legs, depending on your skin and hair type, your skin still may not be completely smooth post-waxing.
This post was medically reviewed by Dr. Jennifer Haley, a board-certified dermatologist with extensive experience in medical, cosmetic, and surgical dermatology. Learn more about Hello Glow’s medical reviewers here. As always, this is not personal medical advice, and we recommend that you talk with your doctor.


