
Beginner’s Guide to Resin Part 3

In section 1 of our resin website series, we in-depth what is resin, and then in part two, we went by the necessary applications required to use it. Now in part 3, making use of our Resin Jewelry Starter Kit (860 031A), we have place together a manual on how to use resin
Get ready your performing region
An necessary part when mastering how to use resin is being familiar with the relevance of a well ready functioning region. You will will need excellent air flow and a clean up, flat surface area to operate on a table future to an open window is fine. Deal with your operate surface with newspaper or a little something identical and disposable to protect towards spills and lay out your tools.

N.B. The acrylic blocks are used to continue to keep things beautifully flat as they are curing. (Blue tac can be utilised to protected parts if needed) Make sure pendant bails dangle more than the edge of the block to retain the environment amount and avoid any tilting.
Evaluate out the resin
This is finished working with a high-quality nozzle on the best of just about every bottle which makes it uncomplicated to rely each individual drop. If you are not working with these varieties of bottles, the resin will want to be weighed out using electronic scales.
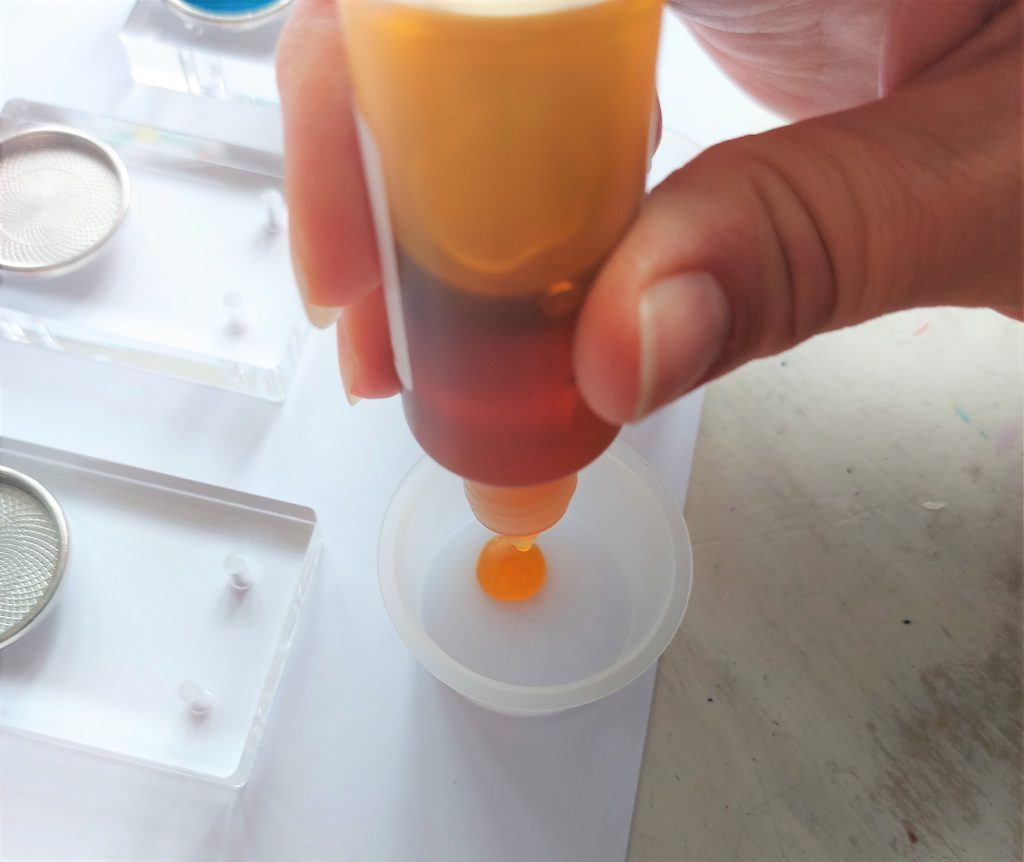
This phase is crucial, so double check your ratio just before setting up to reduce any faults. An critical section when understanding how to use resin is to fully grasp that ratios will differ throughout goods but in this circumstance, it was 2:1, (resin to hardener).
Insert the hardener
This set comes with a pipette, producing it effortless to rely each individual fall of hardener (recall the 2:1 ratio of resin to hardener). In this occasion 20 drops of hardener have been included to 40 drops of resin.
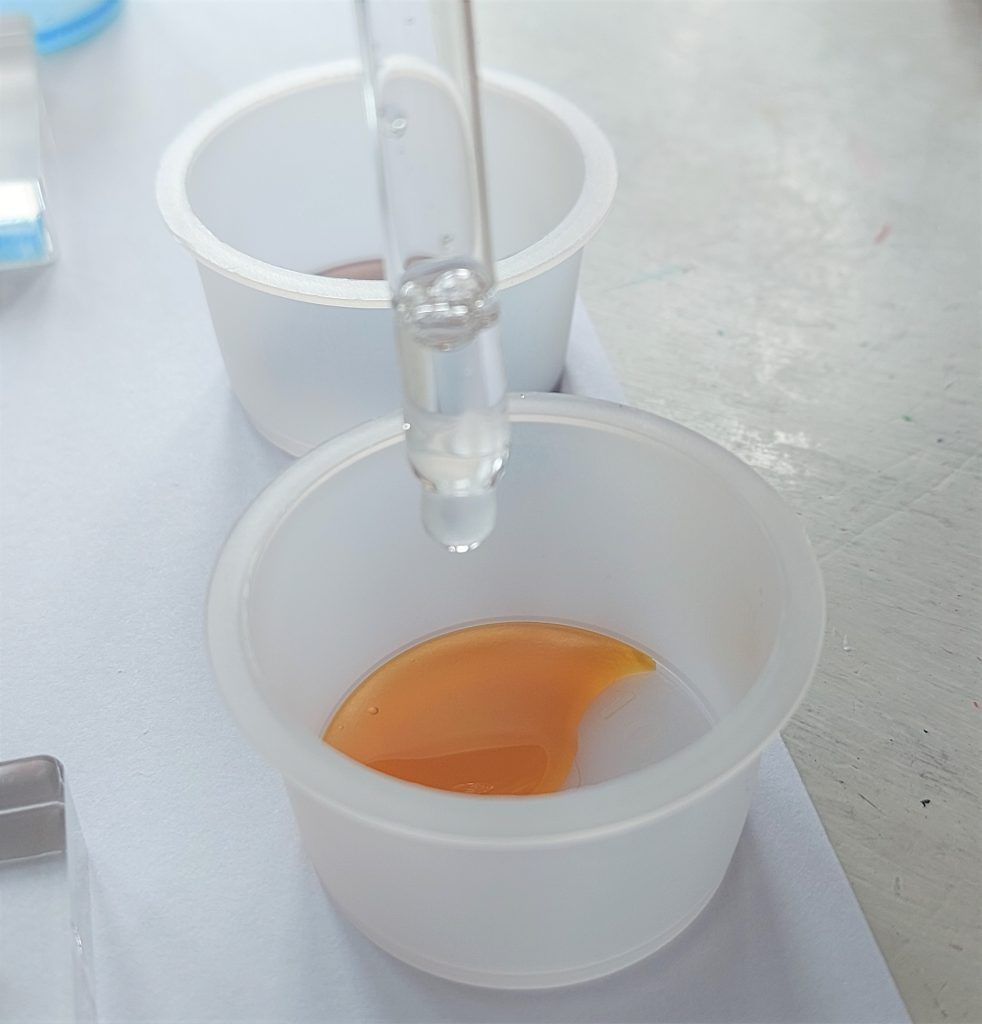
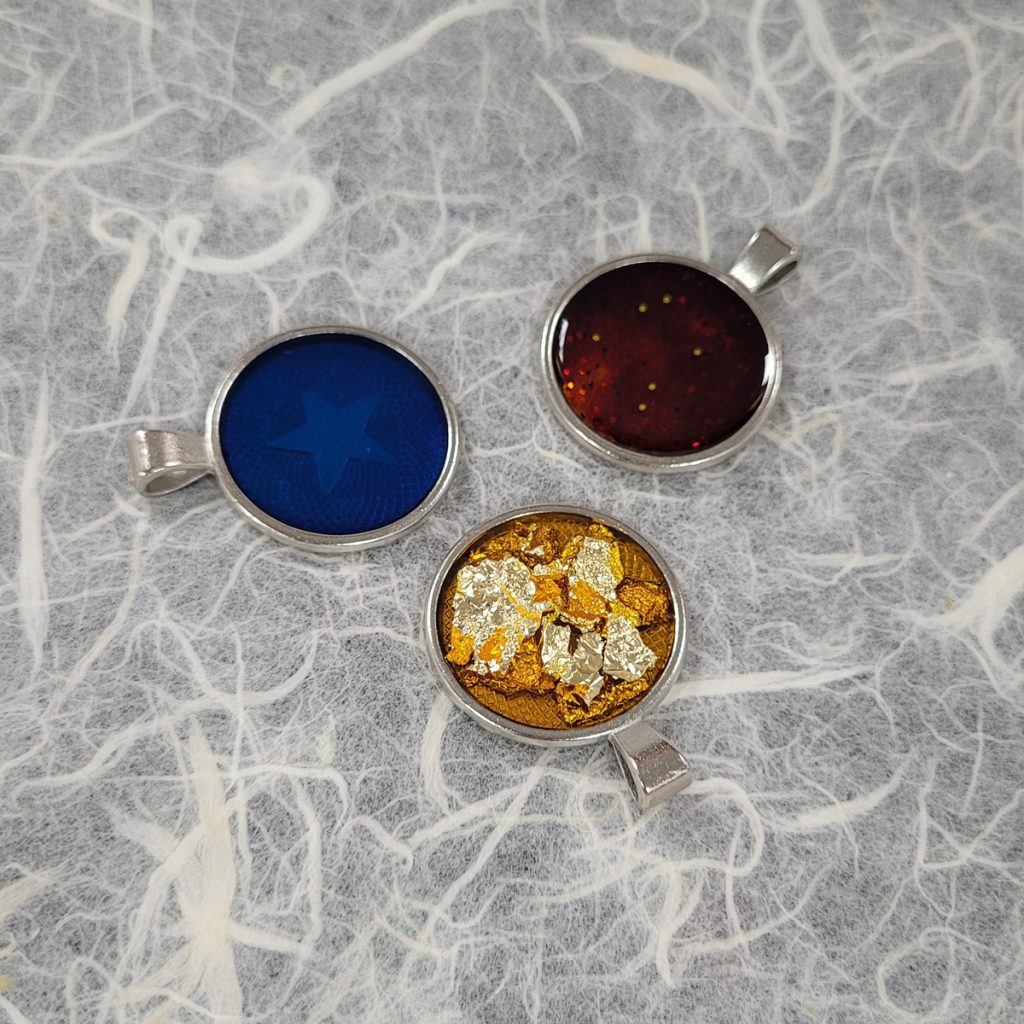
N.B. If applying very clear resin, this is the point to include the colour using either a pigment paste or mica powder. The resin employed in this article was pre-coloured.
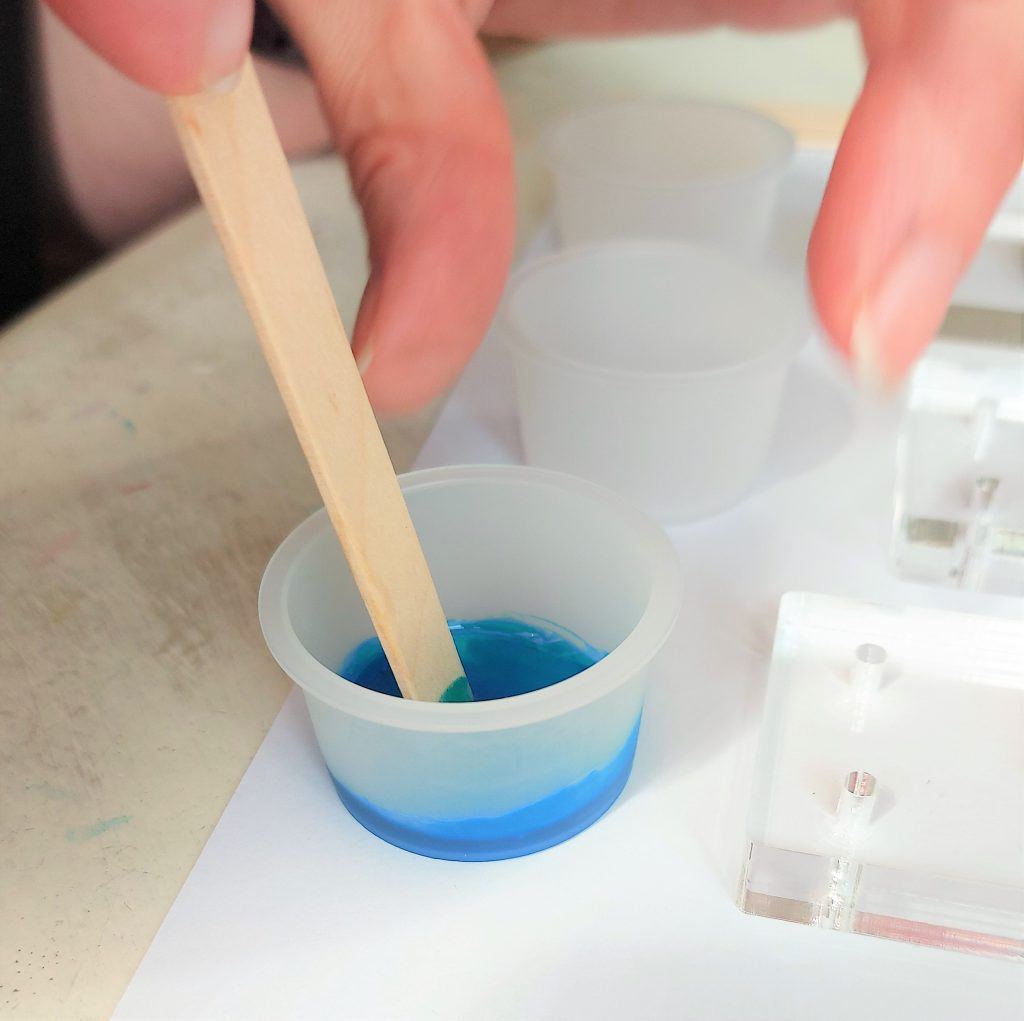
Carefully mix
Stick to the guidelines (generally 1-3minutes) as this will vary throughout products. Prevent bubbles in resin by guaranteeing you are not being more than vigorous, you are aiming for a easy combination.
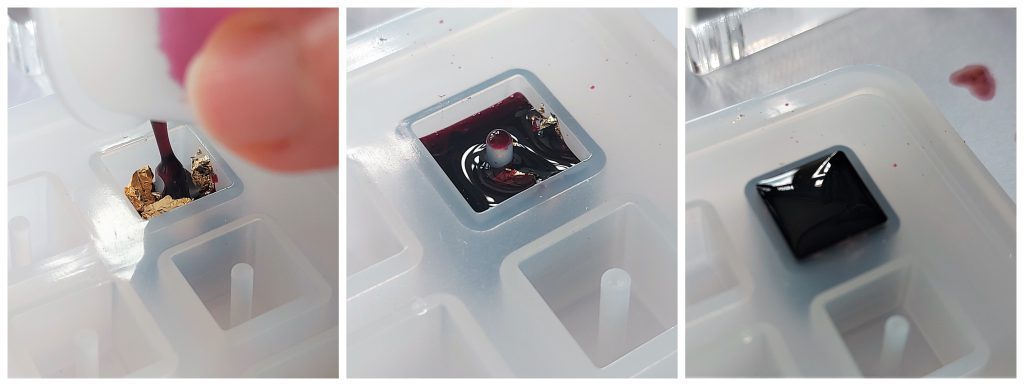
As soon as mixed, you have about 45mins functioning time in advance of the products begins to remedy so start off placing the resin into the location with no also a great deal hold off. You could gradually pour it or use the wooden mixing adhere for far more regulate.
Fill the setting
The resin requires to sit somewhat very pleased of the edge and enable to remedy for 24 several hours at room temperature. (Resin will shrink in the course of the curing system, so you want a good dome of product on the prime of your piece, which will shrink to a flat floor when hardened).
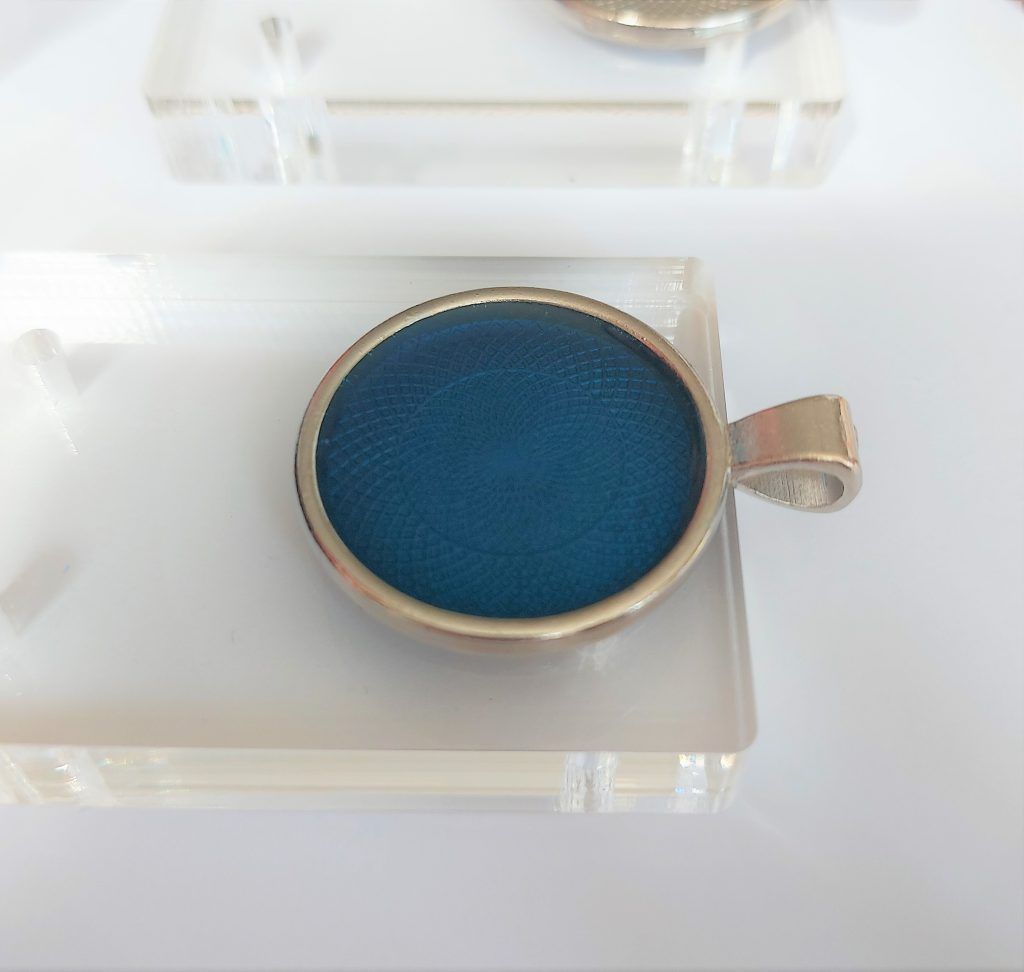
N.B. Once healed, items produced in this way call for no far more finishing and can be worn straight absent. Nevertheless, if you want to cast items, further more steps are necessary to achieve a shiny area.
Adhere to methods 1 – 5 making use of a silicone mould rather of a metal setting.
Sand rough edges
Clear away pieces from the mould just after 24 hrs and sand any rough edges applying moist and dry paper or micro-mesh cloths. Step by step function through the grades relocating from lower to high preserving strokes in the exact same direction. A mask need to be worn whilst doing this
Polish to complete
Utilizing a delicate cotton cloth, use a acceptable polish to buff resin to a significant glow.
Want to obtain out what is resin and how to make jewellery from resin? See more in our Resin Rookies Information collection or see our resin hints and suggestions. What would you like to know about resin?


